Let’s go through the SPA in more detail.
Vuetify.js
I started my project using the Vuetify.js PWA quick start template. Specifically:
- Opened my favourite command line
- Copied command line for the PWA template
vue init vuetifyjs/pwa - Ran the above command
- Opened VS and an integrated command prompt
- Ran
npm run devto see the template in action.
In my case it ran at http://localhost:8080, which is an important to note for the next step.
Just wanted to stress how awesome Vuetify.js is. It gave me an excellent template with Webpack and a service worker. Out of the box it’s mobile-friendly, looks great, I have access to plenty of components, their documentation is great and it continues to improve. Really impressed with it. Oh, and it’s all free.
Vue.js code
The best thing to do is checkout the source code. There’s nothing terribly fancy in here:
- I’m using Vue router, so that I have
wolves,uploadwolves,aboutandcallbackpaths - I’m using axios to upload my image (see the upload.js file)
- I customized all the images, so they match my logo. I used a PWA template but I chose to disable the service worker as I was having problems with it… and frankly I don’t understand service workers (yet)
- I haven’t written any unit or e2e tests. It’s just a demo app. If it wasn’t I most definitely would be making use of it
You can find the code here: https://github.com/bcnzer/wolftracker
Mock API using Azure Function Proxies
When I started development on the “all wolves” page I wanted an API and some real images to display. Trouble is I wasn’t ready to build that API.
Turns out I could easily create a mock endpoint using Azure Function Proxies. Please note I deleted my mock endpoint once I got my actual API in-place.
Under my Azure Function I clicked Proxies. Click Add and you get a New Proxy screen. Key things are:
- Give it a name. This is something purely for you
- Specify the route template. Notice I called mine
/mock/api/getwolves - Optional: choose allowed HTTP methods. I only wanted to allow GET
- Expand Response override. I entered:
- Status code of 200
- Body was a bunch of JSON (see the gist below)
[caption id="attachment_4610” align="alignnone” width="1225”] My mock endpoint. Note that I created the actual endpoint under a different Azure Function account. I did the above purely for the purpose of taking this picture[/caption]
Here’s what it looks like in Postman. Note that this wasn’t actually my URL for my mock endpoint. I setup the proxy in a different Azure Function. I’ve since deleted the mock proxy.
[caption id="attachment_4611” align="alignnone” width="1163”] Response from my mock endpoint[/caption]
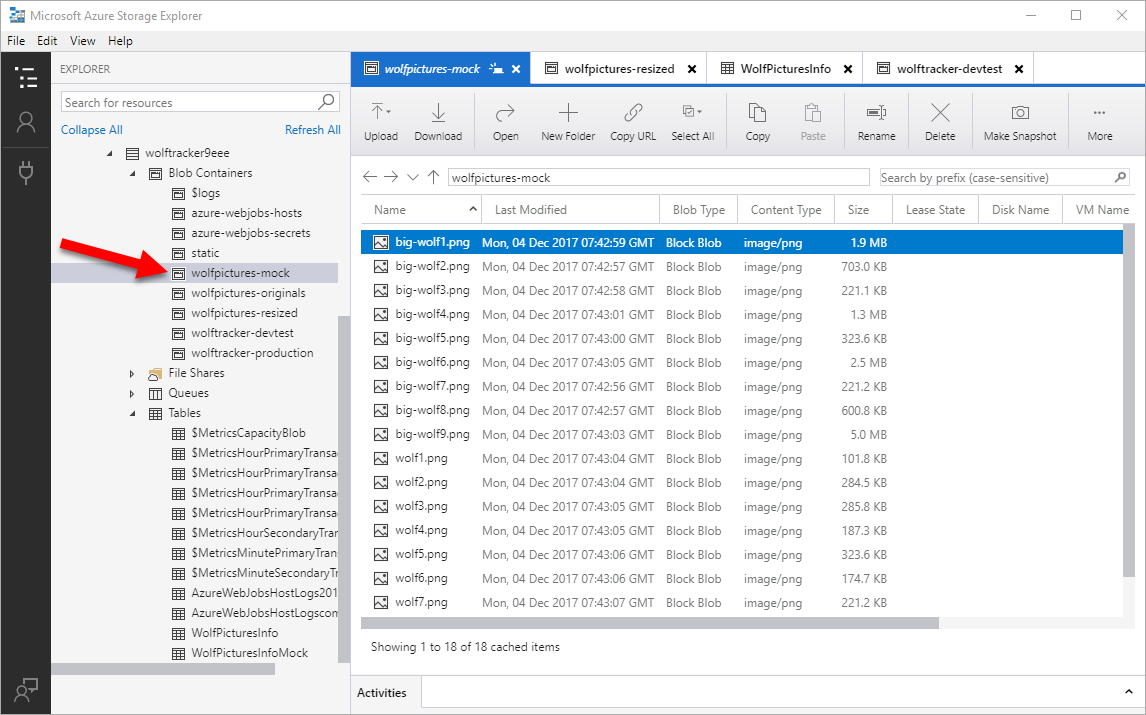
For the images I went into Azure Storage Explorer, Blob Containers and created wolfpictures-mock. In that container I uploaded some pictures. For each image I store the original and thumbnail. Starting out I put them all into that one container.
Auth0 Setup
I’m using Auth0 to handle my authentication. I wanted people to login with their Twitter, GitHub or Google accounts.
Auth0 has a great free tier and you do not need to provide a credit card.
Logo
I wanted to use my wolf tracker logo in Auth0 and elsewhere.
- Opened Azure Storage Explorer, logged in with Azure account
- Went to my storage account
- Created a container called
static - Upload several variations of my logo, in different dimensions
[caption id="attachment_4604” align="aligncenter” width="150”]![]() My logo[/caption]
My logo[/caption]
Auth0 Configuration
- Setup a new tenant called wolftracker
- Clicked Clients > Create Client
- Entered a name Wolf Tracker
- Selected Single Page Web Applications
- Clicked Create
[caption id="attachment_4606” align="alignnone” width="1223”] My Wolf Tracker client in Auth0[/caption]
Connection settings
Clicked the Settings tab and entered:
- Set Description to “Wolf Tracker demo application”
- Entered a URL to my logo, which happened to be in Azure Storage
- In Allowed Callback URLs I entered
- In Allowed Logout URLs I entered
I’ll come back to those other URLs later, as I set everything up properly.
Social Connections
To allow people to login with their Google, GitHub or Twitter accounts I did this:
- Clicked Connections > Social
- Clicked one of the connections
- Followed the instructions on how to obtain an App ID and Secret for each service
- Repeated for the other services
- Went back to the client, clicked Connections and ensured all three were enabled. I also deselected the default
Username-Password-Authenticationdatabase, as I didn’t want to create / manage usernames, deal with password resets, etc
[gallery ids="4607,4608” type="slideshow”]
Hosted Pages
I don’t want to build my own login page. I’d much rather let Auth0 do as much of the heavy-lifting as possible.
I went into Hosted Pages, clicked Customized Login Page and changed a few things such as:
- Set the Window title (line 6)
- Primary color, so it better matches my look & feel (line 50)
- Path to the logo (line 51)
Auth0 Integration in my Vue.js Application
At this point I followed the instructions from Auth0. There are two tutorials:
- https://auth0.com/docs/quickstart/spa/vuejs/01-login
- https://auth0.com/blog/vuejs2-authentication-tutorial/
If you want to use my source you will need to go into auth0-variables.js and enter your own domain, clientId and callbackUrl.
Once again you can view all my source here: https://github.com/bcnzer/wolftracker
Cloudflare
I bought a URL: wolftracker.nz. I wanted to use that and set it up behind Cloudflare.
Setting up the URL is pretty easy in Cloudflare. Just a matter of messing with DNS from what I recall.
Once that’s done you need to go into your function, Platform Features > Custom Domains. I followed the instructions to map wolftracker.azurewebsites.net to wolftracker.nz. Just a matter of creating a CNAME record.
But wait, there’s more cool stuff
Once that boring bit is setup we can get to the really cool part!
I don’t want to pay for an SSL cert yet I want to require it for all traffic. I can use Cloudflare’s cert and enable it easily by
- Opening Cloudflare for my wolftracker.nz URL
- Clicking the Crypto heading
- Enable Always use HTTPS

The added benefit of Cloudflare is that it acts as a CDN. It’s auto-magical. I don’t need to do anything special for it to work.
Next Up - Part 2
In Part 2 we talk about Distributing the SPA