I moved from WordPress and survived! Here’s how.
Photo by Mantas Hesthaven on Unsplash
Background
Back in 2015 I decided to start my own blog. At the time I wanted something easy to use and free of ads, so I went with WordPress.com (via a company called Automatic), purchased a domain, picked a theme and started writing.
The service has been great - works well, constantly improves, feature rich. But it always bugged me I was paying about $130 USD a year (especially as the exchange rate got worse). I sucked it up last year but now I finally decided to take the plunge and get it done.
Goal
I had a few goals for my blog:
- Free (well, aside from the domain)
- I want to control my domain. It was tied up as part of WordPress
- Minimize impact. I want my URLs to continue to work as other sites link to my blog
- Static site, with all the goodness that provides
- No cookies. No Google Analytics
- Would like some basic stats. Decided I’d be happy with stats from Cloudflare
Step 1 - move my domain
I bought my domain through WordPress.com. There was a mechanism to allow me to transfer my domain so I moved it to Cloudflare. That was relatively painless.
Big benefit there is it’s wholesale prices, it’s handles all things DNS and gives me a bunch of extra functionality incase I need it.
The problem with this is that, while I setup all the DNS entries, WordPress later demanded I change the name servers. I can’t do that in Cloudflare without paying for a different tier so I created a rule, in Cloudflare so that anything coming from liftcodeplay.com went to liftcodeplay.wordpress.com. This worked well.
Step 2 - What tool or framework?
There are heaps out there! I chose Hugo
- It’s easy to use
- Fast
- Provides heaps of themes
The last point was especially important as I quite liked my current WordPress theme and… because I suck at CSS, UI and UX.
I chose the Hugo Swift Theme. It was close to what I had… but not quite. My site was a bit simpler and had three posts per row.
The theme made use of SASS, which meant I had to install the Hugo Extended. I’m on Windows and it was easy to download and install
choco install hugo-extended -confirm
Going back to theme: I managed to tweak it get it closer to my current look and feel. It’s not as fancy as what I had but it will work nicely.
Step 3 - Hosting provider
So many options! I decided to go with Netlify as I had little experience with it and it would be free.
Setting up the site was a piece of cake: I hooked up my repo, in Github, and got it all working pretty quickly.
I was also able to setup the DNS to point to Netlify but I later removed it, to do as a final step.
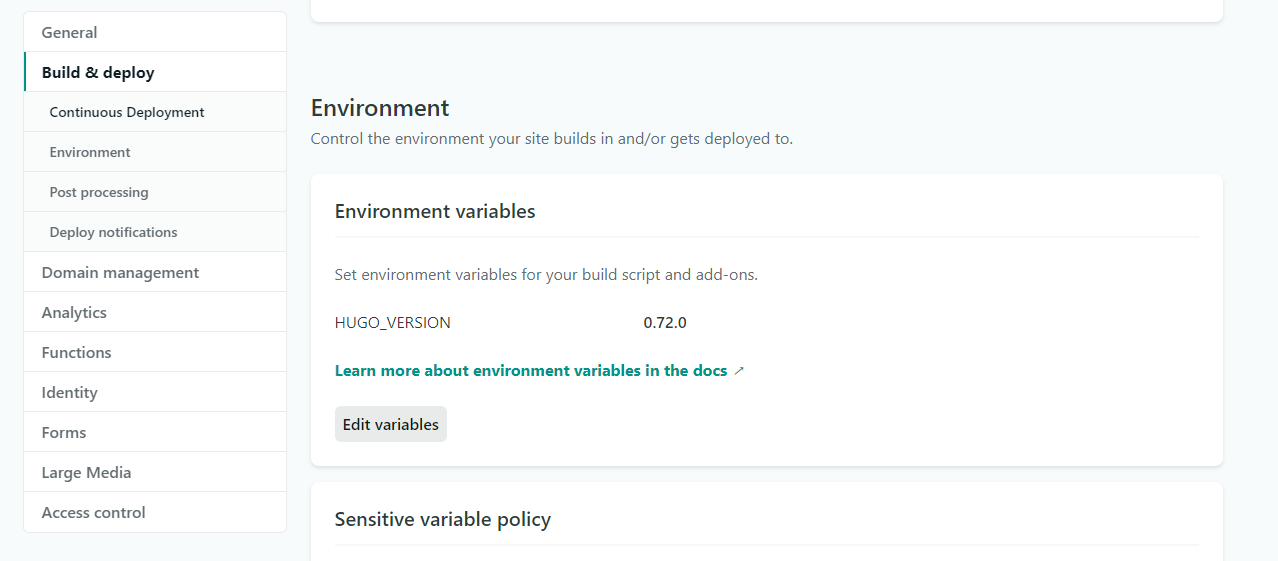
There was only one thing that caught me out. In the Environment part of the Build & deploy I had to specify the Hugo Version. Easy enough… but the thing that caught me out was I had to specify a very precise version i.e. I’m on v0.72 but in the UI I had to type 0.72.0, with the .0 at the end.
Step 4 - Migrating my content
Turns out I had 87 blog posts plus 3 pages. That’s a fair bit of content!
At first I tried to copy and paste the content and the images. It was painful but gave me some practice with markdown.
I later discovered this blog post.
Export Part 1 - Exporting from WordPress
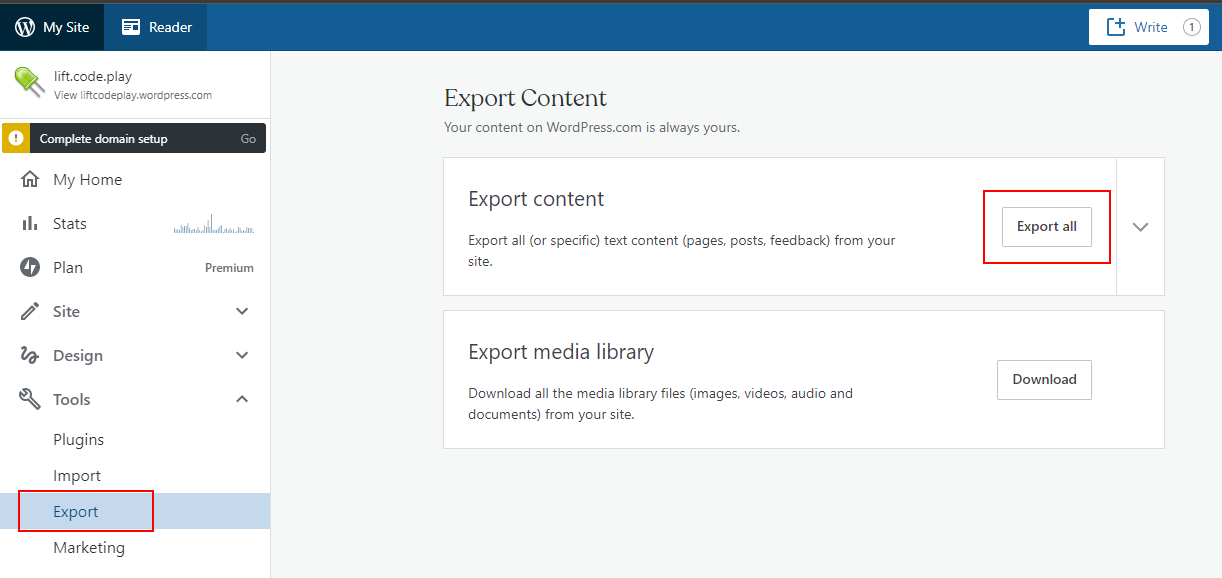
I went in WordPress Admin > Tools > Export and selected Export All
I saved this file as export.xml
Export Part 2 - Cloned the repo
Cloned the repo and put the export.xml in the root of the directory.
git clone https://github.com/lonekorean/wordpress-export-to-markdown
Export Part 3 - Converting WordPress to Markdown… with a bit of manual work
The tool worked well. The posts were Markdown and the images downloaded… but it wasn’t perfect. For example:
- I wanted each post to list the author. It didn’t
- It could create sub folders by year and month… but not day
- My Gists were being displayed as a link
- The banner image for each post was in the wrong directory
- Tags didn’t get exported
I went into the code and extended it. It fixed the first two and the remainder I solved by hand.
Step 5 - Building my pages
I had some pages - About and Talks. I recreated those by hand and tidied it up a bit. I don’t recall the tool offering to export my pages.
Step 6 - Testing, tweaking the UI
My primary concern were my recent posts from this year
I noticed the conversion process didn’t work well for my oldest posts, from 2015. I chose not to care. Content is all there it’s just the formatting that was off.
I was also able to confirm that everything looked in terms of Netlify and deployments.
Step 7 - Comments
A downside of the migration is I lost all the comments from users. There could be some good discussion. I decided I was ok with this but I wanted a mechanism for people to write comments.
There was a service called Staticman that came with the theme but I couldn’t get it setup.
I was recommended utteranc.es and went with that. It was easy to setup.
Step 8 - Go Live!
The DNS entries for the site were all good to go. Had been days earlier but there was a rule that forwarded traffic to WordPress. I disabled the rule and I was all done - it worked!
Reviewing my goals, I achieved everything. Quite happy with the outcome as the process of blogging is so much better.
I wrote all this in Visual Studio Code with preview enabled plus hugo server running so I had a hot loading, local view of my blog. In a moment I’ll deploy by pushing a commit to master and I’ll be done.